


Search is an important part of applications, yet it can be overlooked as a simple task. “Just add LIKE boolean matches and we’re good to go.” Well, while the Like clause can be handy, sometimes we have to accommodate a more robust searching system. Elasticsearch is one of the most popular tools to achieve that.
Elasticsearch is a very powerful tool and it comes with a variety of useful features and complementary tools. We are going to cover the basics here and leave you with some links for more resources if you want to dig further.
This is an updated 2021 edition of one of our most popular articles about Laravel and Elasticsearch.
Let’s dive right in.
What is Elasticsearch?
From the official website:
Elasticsearch is the distributed search and analytics engine at the heart of the Elastic Stack. Elasticsearch is where the indexing, search, and analysis magic happen. Elasticsearch is the distributed search and analytics engine at the heart of the Elastic Stack. (…) [it] provides near real-time search and analytics for all types of data. Whether you have structured or unstructured text, numerical data, or geospatial data, Elasticsearch can efficiently store and index it in a way that supports fast searches.Elasticsearch Introduction
In other words: we can use Elasticsearch for logging (see the Elastic Stack) and for searching. We are only covering the searching usage in this article.
About madewithlove
We are a remote company from Belgium. We love building digital products and the teams to run it. But mainly, we are happy people. Interested in getting to know us better? Take a quick look on our culture page. Feel like applying? We accept open applications from all over the world here.
Basics about Elasticsearch
We used to translate the Relational concepts to Elasticsearch, but now this kind of comparison is out-dated. In order to fully understand the tool, we better start from scratch, no SQL comparison.
First of all, Elasticsearch is document-oriented and talks REST, so it can be used in any language. Now, let’s dive a bit deeper on its basic concepts.
Index and Types
As I said before, Elasticsearch is a document-oriented search-engine. That means we search, sort, filter, etc., documents. A document is represented in JSON format and it holds information that can be indexed. We usually store (aka index, from “to index”) documents with similar mapping structure (fields) together and we call it an index. There can be one index for users, another for articles and another for products, for example.
Inside the index, we can have one or more types. We usually have one type, but having multiple types in an index can be useful sometimes. Let’s say we have a Contact entity which is the parent (inheritance) of Lead and Vendor entities. Although we could store both entities in the same “contacts” type inside the “contacts” index, it might be interesting to store these contacts in separate types inside the “contacts” index, so having “leads” and “vendors” types inside the “contacts” index.
It’s worth saying that Elasticsearch is schema-free but not schema-less (see here), this means that we can index whatever we want and it will figure out the data types, but we can’t have the same field holding different data types. However, we cannot have the same field holding different data types. I once had an issue where the first document indexed had a property that was supposed to be a double, but the first document happened to have a round number, which gave the type integer to the property, causing lots of failed index attempts. Anyways, in order to have better query results and avoid unexpected behavior, we better define those data types for our mappings.
For a more accurate overview, check the official documentation.
Update: As pointed out by Peter Steenbergen on Twitter, Elasticseach is moving away from types for the next major version (8), so you will only have single-typed indexes in the future. You can read more about it here.
Local environment
It’s likely that you don’t have Elasticsearch running in your local machine. We are going to be using Docker here, but don’t worry, you can run it without Docker by following the official docs, if you want to.
Let’s make use of Laravel Sail and then we can add an Elasticsearch service to the docker-compose.yml file it generates.
First, let’s create the application using the Laravel Installer:
laravel new elasticsearch-2021-demoThen, let’s publish the Laravel Sail docker-compose.yml:
php artisan sail:install --with=mysqlNote: Laravel Sail comes installed by default in fresh Laravel 8 applications. All we have to do is run the `sail:install` command to publish the docker-compose.yml file.
After that, we now have a Dockerized local environment. How cool is that? To get the containers running you need to bring them up:
sail up -dI can use `sail` because I’ve added `./vendor/bin/` to my `$PATH` variable. If you don’t have that configured, make sure you run your Sail commands like this:
./vendor/bin/sail up -dWith any luck, we have our application running in a container at port `80`, so we can access it at `http://localhost` in the browser. We also have a MySQL container running at `127.0.0.1:3306`.
There might be a slight chance that you have to tweak the ports here for your local setup. For example, this might fail if you have Laravel Valet running locally because it already uses port 80 on your machine. Or if you have a MySQL instance running locally as well using port 3306. If you’ve had any of these issues, you can configure the local port shared with the container by setting the `APP_PORT` and `FORWARD_DB_PORT` environment variables in your `.env` file:
 FORWARD_DB_PORT=33060
 APP_PORT=8000
After that, try running the command up command again:
sail up -dThis time, your Laravel app can be found at `http://localhost:8000` and you can connect to your MySQL instance at `127.0.0.1:33060`.
Let’s now install Elastichsearch to this Sail setup. All we have to do is add a new service to our `docker-compose.yml` file:
elasticsearch:
         image: docker.elastic.co/elasticsearch/elasticsearch:7.5.2
         environment:
             - discovery.type=single-node
         ports:
             - 9200:9200
             - 9300:9300
         volumes:
             - sailelasticsearch:/usr/share/elasticsearch/data
         networks:
             - sail
And, with that, we also need to a new volume that this service will used called `sailelasticsearch`:
 volumes:
     sailmysql:
         driver: local
     sailelasticsearch:
         driver: local
Now, we can run the up command again:
sail up -dThis should download the official Elasticsearch image and boot the container, which will be running at your 9200 port locally. One this is complete, you can reach for it using curl:
 curl localhost:9200
 {
   "name" : "30c0efd3ac05",
   "cluster_name" : "docker-cluster",
   "cluster_uuid" : "4ZF3qhGxSfSrRFI1VkMDvw",
   "version" : {
     "number" : "7.5.2",
     "build_flavor" : "default",
     "build_type" : "docker",
     "build_hash" : "8bec50e1e0ad29dad5653712cf3bb580cd1afcdf",
     "build_date" : "2020-01-15T12:11:52.313576Z",
     "build_snapshot" : false,
     "lucene_version" : "8.3.0",
     "minimum_wire_compatibility_version" : "6.8.0",
     "minimum_index_compatibility_version" : "6.0.0-beta1"
   },
   "tagline" : "You Know, for Search"
 }
This means we’re ready for the next steps.
Note: if you run into trouble with these steps, make sure to check the documentation. For example, I’ve had issues in the past with not enough RAM where I had to enable memory lock to prevent Elasticsearch heap memory from being swapped out – which in Docker land can be done by adding the `bootstrap.memory_lock=true` environment variable to your `docker-compose.yml` file (reference), and also with the `cm_max_map_count` Kernel setting (reference).
The demo application
Now that we have a fresh install of Laravel and our local development environment running, it’s time to build the actual app. The first thing we need to do is generate some sample data. For that, we’ll have a seed command that will populate the database and, while it does that, it also indexes all of the data in the Elasticsearch using an Observer. Don’t worry, we’ll do this all step-by-step.
Before we start working on that, let’s install the Elasticsearch PHP SDK using Composer:
sail composer require elasticsearch/elasticsearchNext, we’re going to install the Laravel Breeze package so we can get a basic application scaffolding for us:
sail composer require laravel/breeze --devThen we can install breeze, pull the NPM dependencies, compile the assets, and run the migration:
sail artisan breeze:install
sail npm install
sail npm run dev
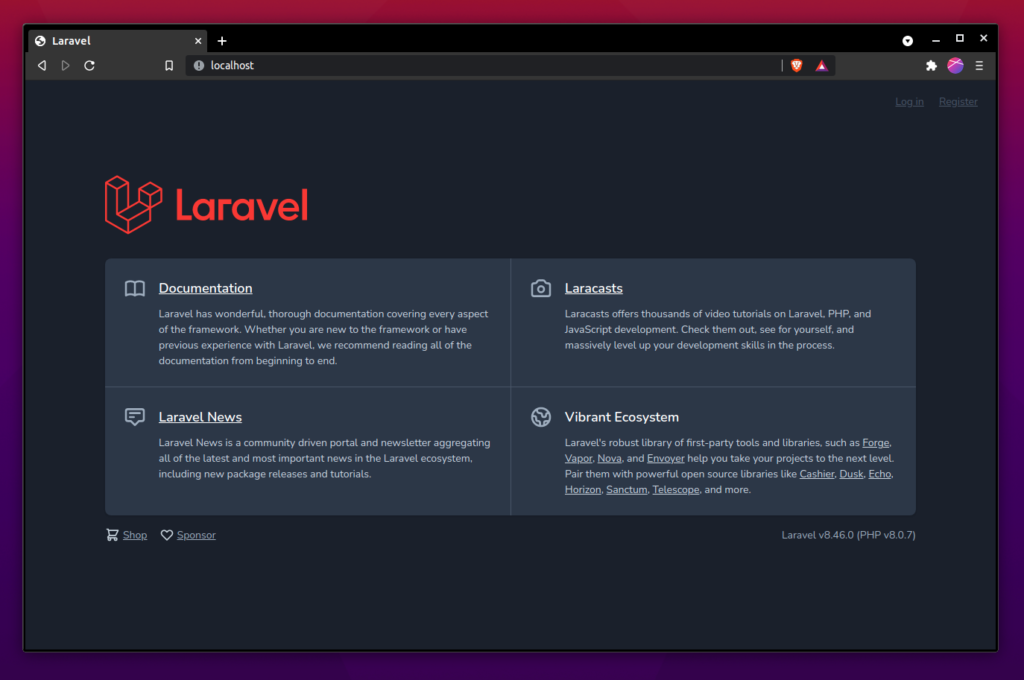
sail artisan migrateNow, if you open the application in the browser, you should see Laravel’s welcome page with the Login and Register links floating at the top:
Next, we’re going to use the concept of articles in our demo. For that, we’ll need an Article model and a migration to add its table to the database. We can do that by running the `make:model` command passing the the `-mf` flags to it, where `-m` tells it to also create the migration for this new model, and the `-f` flag tells it to create the model factory:
sail artisan make:model -mf ArticleWe have to make some changes to the migration we just created. Locate the `create_articles_table` migration inside the `database/migrations/` folder, it should have the current DateTime prefixing the file. Open it up and set add the fields we’re going to need in the articles table:
 Schema::create('articles', function (Blueprint $table) {
     $table->id();
     $table->string('title');
     $table->text('body');
     $table->json('tags');
     $table->timestamps();
 });
The tags field will be an Array that should be stored as JSON inside the articles table. We need to configure our model to cast it properly like so:
 <?php
 namespace App\Models;
 use Illuminate\Database\Eloquent\Factories\HasFactory;
 use Illuminate\Database\Eloquent\Model;
 class Article extends Model
 {
     use HasFactory;
     protected $casts = [
         'tags' => 'json',
     ];
 }
Now, we need to generate some test data so we can play with it. Open up the `DatabaseSeeder` at `database/seeders/` and add make sure it looks like the following:
 <?php
 namespace Database\Seeders;
 use App\Models\Article;
 use Illuminate\Database\Seeder;
 class DatabaseSeeder extends Seeder
 {
     public function run()
     {
         Article::factory()->times(50)->create();
     }
 }
The seeder is using Laravel’s Model Factory feature to create 50 fake articles for us. However, we haven’t configured the ArticleFactory yet. To do so, open up the `database/factories/ArticleFactory.php` and make it look like the following:
 <?php
 namespace Database\Factories;
 use App\Models\Article;
 use Illuminate\Database\Eloquent\Factories\Factory;
 class ArticleFactory extends Factory
 {
     protected $model = Article::class;
     public function definition()
     {
         return [
             'title' => $this->faker->sentence(),
             'body' => $this->faker->text(),
             'tags' => collect(['php', 'ruby', 'java', 'javascript', 'bash'])
                 ->random(2)
                 ->values()
                 ->all(),
         ];
     }
 }
Let’s migrate fresh and seed the database with 50 fake articles:
sail artisan migrate:fresh --seedWe should now have 50 entries inside the articles table in the database. Let’s have a basic list of articles. To do that, replace the `resources/views/dashboard.blade.php` view with the following content:
<x-app-layout>
    <x-slot name="header">
        <h2 class="font-semibold text-xl text-gray-800 leading-tight">
            {{ __('Articles') }} <span class="text-gray-400">({{ $articles->count() }})</span>
        </h2>
    </x-slot>

    <div class="py-12">
        <div class="max-w-7xl mx-auto sm:px-6 lg:px-8">
            <div class="bg-white overflow-hidden shadow-sm sm:rounded-lg">
                <div class="p-6 bg-white border-b border-gray-200 space-y-8">
                    @forelse ($articles as $article)
                        <article class="space-y-1">
                            <h2 class="font-semibold text-2xl">{{ $article->title }}</h2>

                            <p class="m-0">{{ $article->body }}</body>

                            <div>
                                @foreach ($article->tags as $tag)
                                    <span class="text-xs px-2 py-1 rounded bg-indigo-50 text-indigo-500">{{ $tag}}</span>
                                @endforeach
                            </div>
                        </article>
                    @empty
                        <p>No articles found</p>
                    @endforelse
                </div>
            </div>
        </div>
    </div>
</x-app-layout>
That makes use of an `$articles` variable, which we need to pass down from the dashboard route definition. So, open up the `routes/web.php` file and change the dashboard route to something like this:
 Route::get('/dashboard', function () {
     return view('dashboard', [
         'articles' => App\Models\Article::all(),
     ]);
 })->middleware(['auth'])->name('dashboard');
Now, go to the application in the browser and, after creating an account, you will see the full list of articles listed:
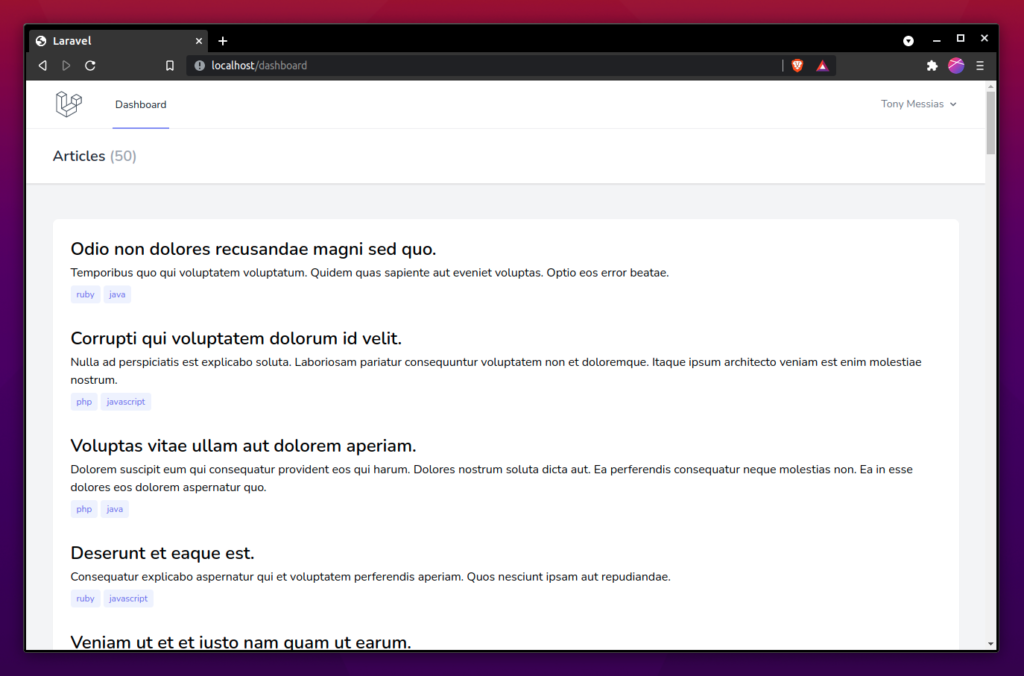
Nothing fancy, but enough for us to start implementing the search feature. We’ll start by implementing it using nothing but Eloquent and MySQL. Let’s add a Repository here, I find this pattern useful when I need different implementations for fetching data. Our repository interface would look like this:
<?php

namespace App\Articles;

use Illuminate\Database\Eloquent\Collection;

interface SearchRepository
{
    public function search(string $query): Collection;
}
And the Eloquent implementation would be:
 <?php
 namespace App\Articles;
 use App\Models\Article;
 use Illuminate\Database\Eloquent\Collection;
 class EloquentSearchRepository implements SearchRepository
 {
     public function search(string $term): Collection
     {
         return Article::query()
             ->where(fn ($query) => (
                 $query->where('body', 'LIKE', "%{$term}%")
                     ->orWhere('title', 'LIKE', "%{$term}%")
             ))
             ->get();
     }
 }
Now, we can bind that interface in the AppServiceProvider, like so:
 <?php
 namespace App\Providers;
 use App\Articles\EloquentSearchRepository;
 use App\Articles\SearchRepository;
 use Illuminate\Support\ServiceProvider;
 class AppServiceProvider extends ServiceProvider
 {
     public function register()
     {
         $this->app->bind(SearchRepository::class, EloquentSearchRepository::class);
     }
 }
Cool. Let’s make sure our dashboard route supports searching for articles. It will accept a `q` Query String and, when available, it will use the repository we have just created instead of listing all articles, like so:
 use App\Articles\SearchRepository;
 Route::get('/dashboard', function (SearchRepository $searchRepository) {
     return view('dashboard', [
         'articles' => request()->has('q')
             ? $searchRepository->search(request('q'))
             : App\Models\Article::all(),
     ]);
 })->middleware(['auth'])->name('dashboard');
Then, we need to add the search field to the dashboard page so we can, you know, search:
 <x-app-layout>
     <x-slot name="header">
         <h2 class="font-semibold text-xl text-gray-800 leading-tight">
             {{ __('Articles') }} <span class="text-gray-400">({{ $articles->count() }})</span>
         </h2>
     </x-slot>
     <div class="py-12">
         <div class="max-w-7xl mx-auto sm:px-6 lg:px-8">
             <div class="bg-white overflow-hidden shadow-sm sm:rounded-lg">
                 <div class="p-6 bg-white border-b border-gray-200">
                     <form action="{{ route('dashboard') }}" method="get" class="pb-4">
                         <div class="form-group">
                             <x-input
                                 type="text"
                                 name="q"
                                 class="form-control"
                                 placeholder="Search..."
                                 value="{{ request('q') }}"
                             />
                         </div>
                     </form>
                     @if (request()->has('q'))
                         <p class="text-sm">Using search: <strong>"{{ request('q') }}"</strong>. <a class="border-b border-indigo-800 text-indigo-800" href="{{ route('dashboard') }}">Clear filters</a></p>
                     @endif
                     <div class="mt-8 space-y-8">
                         @forelse ($articles as $article)
                             <article class="space-y-1">
                                 <h2 class="font-semibold text-2xl">{{ $article->title }}</h2>
                                 <p class="m-0">{{ $article->body }}</body>
                                 <div>
                                     @foreach ($article->tags as $tag)
                                         <span class="text-xs px-2 py-1 rounded bg-indigo-50 text-indigo-500">{{ $tag}}</span>
                                     @endforeach
                                 </div>
                             </article>
                         @empty
                             <p>No articles found</p>
                         @endforelse
                     </div>
                 </div>
             </div>
         </div>
     </div>
 </x-app-layout>
Now, let’s search for something:
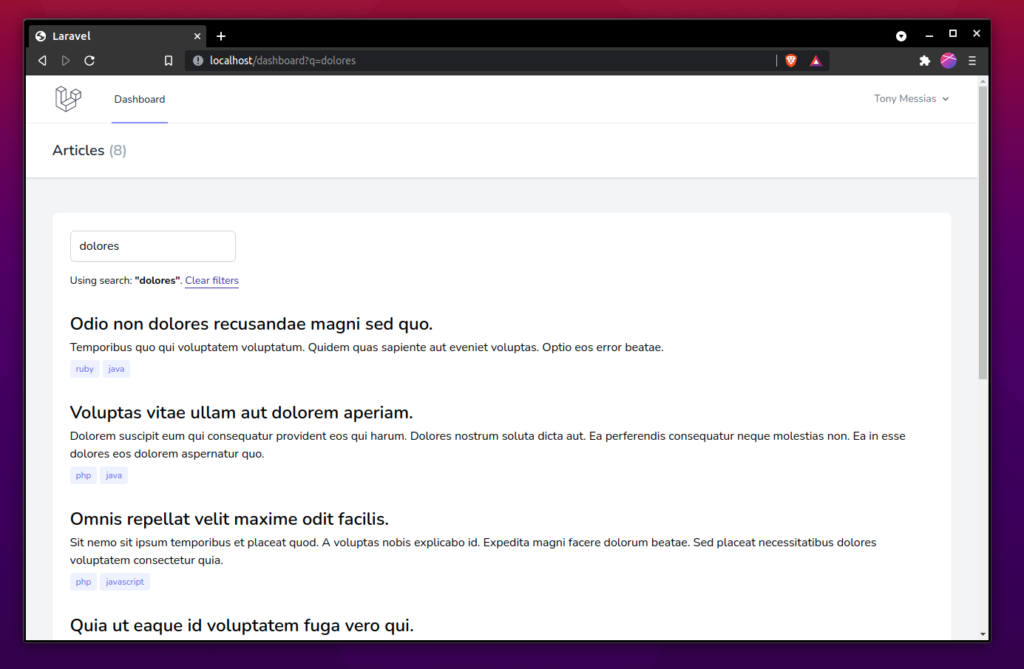
It works! Nice job. We can finally implement the Elasticsearch version of this.
Integrating Elasticsearch
Since Elasticsearch talks REST, what we’re going to do here is basically hook into the Eloquent models we want to index to it and send some HTTP requests to the Elasticsearch API.
We’re going to use Model Observers in this example. This way, we can reuse this same setup for different types of models we want to index.
First, let’s create the ElasticsearchObserver:
<?php

namespace App\Search;

use Elasticsearch\Client;

class ElasticsearchObserver
{
    public function __construct(private Client $elasticsearchClient)
    {
        // ...
    }

    public function saved($model)
    {
        $model->elasticSearchIndex($this->elasticsearchClient);
    }

    public function deleted($model)
    {
        $model->elasticSearchDelete($this->elasticsearchClient);
    }
}
We need to bind this observer into all of our Models that we want to index in Elasticsearch. We can do that by introducing a new Searchable trait. This trait will also provide the methods the observer uses:
<?php

namespace App\Search;

use Elasticsearch\Client;

trait Searchable
{
    public static function bootSearchable()
    {
        if (config('services.search.enabled')) {
            static::observe(ElasticsearchObserver::class);
        }
    }

    public function elasticsearchIndex(Client $elasticsearchClient)
    {
        $elasticsearchClient->index([
            'index' => $this->getTable(),
            'type' => '_doc',
            'id' => $this->getKey(),
            'body' => $this->toElasticsearchDocumentArray(),
        ]);
    }

    public function elasticsearchDelete(Client $elasticsearchClient)
    {
        $elasticsearchClient->delete([
            'index' => $this->getTable(),
            'type' => '_doc',
            'id' => $this->getKey(),
        ]);
    }

    abstract public function toElasticsearchDocumentArray(): array;
}
Next, we can use the trait in our Article model like so:
<?php

namespace App\Models;

use App\Search\Searchable;
use Illuminate\Database\Eloquent\Factories\HasFactory;
use Illuminate\Database\Eloquent\Model;

class Article extends Model
{
    use HasFactory;
    use Searchable;

    protected $casts = [
        'tags' => 'json',
    ];
}
Now, whenever we create, update, or delete an Article using the Eloquent model, it triggers the ElasticsearchObserver to sync the data accordingly. Note that this happens synchronously during the HTTP request. A better way is to use queues and have the indexing happening in background, eventually.
So far, so good. Let’s implement the Elasticsearch version of our Search repository and make use of it.
The Elasticsearch Repository
We’re now able to feed Elasticsearch with our articles. We can still keep the Eloquent implementation of the repository as a backup to fall back to in case our Elasticsearch servers crash or you want to do some maintenance work on it. In order to do so, let’s create a new implementation of our Search Repository interface:
<?php

namespace App\Articles;

use App\Article;
use Elasticsearch\Client;
use Illuminate\Support\Arr;
use Illuminate\Database\Eloquent\Collection;

class ElasticsearchRepository implements ArticlesRepository
{
    /** @var \Elasticsearch\Client */
    private $elasticsearch;

    public function __construct(Client $elasticsearch)
    {
        $this->elasticsearch = $elasticsearch;
    }

    public function search(string $query = ''): Collection
    {
        $items = $this->searchOnElasticsearch($query);

        return $this->buildCollection($items);
    }

    private function searchOnElasticsearch(string $query = ''): array
    {
        $model = new Article;

        $items = $this->elasticsearch->search([
            'index' => $model->getSearchIndex(),
            'type' => $model->getSearchType(),
            'body' => [
                'query' => [
                    'multi_match' => [
                        'fields' => ['title^5', 'body', 'tags'],
                        'query' => $query,
                    ],
                ],
            ],
        ]);

        return $items;
    }

    private function buildCollection(array $items): Collection
    {
        $ids = Arr::pluck($items['hits']['hits'], '_id');

        return Article::findMany($ids)
            ->sortBy(function ($article) use ($ids) {
                return array_search($article->getKey(), $ids);
            });
    }
}
We opted for performing the search on Elasticsearch, and then perform a findMany SQL search with the items that returned from the search. In previous versions of this article, I’ve covered another way where we hydrated the model instances from the indexed data. But I find this mixed Elasticsearch+SQL approach easier and less error-prone since we can opt to only index the searchable data instead of all the model’s attributes.
The trick for switching the repository is to replace the binding in the ServiceProvider, like so:
<?php

namespace App\Providers;

use App\Articles;
use Illuminate\Support\ServiceProvider;

class AppServiceProvider extends ServiceProvider
{
    /**
     * Register any application services.
     *
     * @return void
     */
    public function register()
    {
        $this->app->bind(Articles\ArticlesRepository::class, function ($app) {
            // This is useful in case we want to turn-off our
            // search cluster or when deploying the search
            // to a live, running application at first.
            if (! config('services.search.enabled')) {
                return new Articles\EloquentRepository();
            }

            return new Articles\ElasticsearchRepository(
                $app->make(Client::class)
            );
        });
    }
}
Whenever we request an ArticlesRepository interfaced object from the IoC container, it will actually give an ElasticsearchRepository instance if it’s enabled otherwise it will fall back to the Eloquent version of it.
We need to do some customization to configure the Elasticsearch client, we can bind it in the AppServiceProvider or create a new one, I’m going to use the existing AppServiceProvider, so something like:
<?php

namespace App\Providers;

use App\Articles;
use Elasticsearch\Client;
use Elasticsearch\ClientBuilder;
use Illuminate\Support\ServiceProvider;

class AppServiceProvider extends ServiceProvider
{
    /**
     * Register any application services.
     *
     * @return void
     */
    public function register()
    {
        $this->app->bind(Articles\ArticlesRepository::class, function () {
            // This is useful in case we want to turn-off our
            // search cluster or when deploying the search
            // to a live, running application at first.
            if (! config('services.search.enabled')) {
                return new Articles\EloquentRepository();
            }

            return new Articles\ElasticsearchRepository(
                $app->make(Client::class)
            );
        });

        $this->bindSearchClient();
    }

    private function bindSearchClient()
    {
        $this->app->bind(Client::class, function ($app) {
            return ClientBuilder::create()
                ->setHosts($app['config']->get('services.search.hosts'))
                ->build();
        });
    }
}
Now that we have the code almost ready, we need to finish the configuration. You might have noticed the usages of the config helper method in some places in the implementation. That loads the configuration files data. Here is the configuration I used in the config/services.php:
<?php

return [
    // ...
    'search' => [
        'enabled' => env('ELASTICSEARCH_ENABLED', false),
        'hosts' => explode(',', env('ELASTICSEARCH_HOSTS')),
    ],
];
We set the configuration here and tell Laravel to check the environment variables to find our configuration. We can set it locally in our .env file, like so:
ELASTICSEARCH_ENABLED=true
ELASTICSEARCH_HOSTS="localhost:9200"
We are exploding the hosts here to allow passing multiple hosts using a comma-separated list, but we are not using that at the moment. If you have your php server running, don’t forget to reload it so it fetches the new configs. After that, we need to populate Elasticsearch with our existing data.
To do so, we are going to need a custom artisan command. This command will also be really useful later on if we come to change the schemas of our Elasticsearch indexes, we could change it to drop the indexes and reindex every piece of data we have (or using aliases for a more zero-downtime approach).
Create the CLI command running:
$ php artisan make:command ReindexCommand --command="search:reindex"Now, open it up and edit it, like so:
<?php

namespace App\Console\Commands;

use App\Article;
use Elasticsearch\Client;
use Illuminate\Console\Command;

class ReindexCommand extends Command
{
    /**
     * The name and signature of the console command.
     *
     * @var string
     */
    protected $signature = 'search:reindex';

    /**
     * The console command description.
     *
     * @var string
     */
    protected $description = 'Indexes all articles to Elasticsearch';

    /** @var \Elasticsearch\Client */
    private $elasticsearch;

    public function __construct(Client $elasticsearch)
    {
        parent::__construct();

        $this->elasticsearch = $elasticsearch;
    }

    public function handle()
    {
        $this->info('Indexing all articles. This might take a while...');

        foreach (Article::cursor() as $article)
        {
            $this->elasticsearch->index([
                'index' => $article->getSearchIndex(),
                'type' => $article->getSearchType(),
                'id' => $article->getKey(),
                'body' => $article->toSearchArray(),
            ]);

            // PHPUnit-style feedback
            $this->output->write('.');
        }

        $this->info("\nDone!");
    }
}
Now, we can run this command to feed our Elasticsearch server with data:
$ php artisan search:reindex
Indexing all articles. This might take a while...
..................................................
Done!
Now, restart your artisan serve (so it reloads the config), and search. We could have achieved a similar result with plain SQL. Yes, we could. But Elasticsearch brings other toys to the table. Let’s say, for instance, that you care more about matches in the title field than any other field and you have some tags searching, like so.
If you check it out, each of the results has either PHP or Javascript or both tags. Now, let’s define that relevance rule we got about the title field:
<?php

'query' => [
    'multi_match' => [
        'fields' => ['title^5', 'body', 'tags'],
        'query' => $query,
    ],
],
We are defining here that the matches in title field are 5 times more relevant than the other fields. If you reload, nothing happens.
The first match doesn’t have the right tags, but the title matches with the last term we used, so it boosts up. Cool, we only had to do a few configuration changes, right?
Defining relevance is a very sensitive topic. It might need some meetings and discussions, as well as prototypes before you and your team can decide on what to use.
Wrapping up
We covered the basics here and how to integrate your Laravel app with Elasticsearch. If you want to know more about how to improve your queries, we got you covered! Check out these posts Basic understanding of text search in Elasticsearch and also How to build faceted search with facet counters using Elasticsearch.
Also, did you know that Laravel has its own full-text search official package? It’s called Laravel Scout, it supports Algolia out-of-the-box and you can write custom drivers. It seems to be only for full-text search, though. In case you need to do some fancy searches with aggregations, for example, you can write your own integration. There are packages out there to help you, check out our elasticsearcher package, for example.
You can check this repository for an example of what I’m describing here.
Also read: Performance Tips for Laravel and Get Rid of Ports in your Docker setup with Traefik


Member discussion