


When working in a Docker-based development environment, you usually map the ports of your existing Docker container (port mapping or docker port forwarding) to a port on your own machine so you can browse to the application your container serves. When your container is running, you will browse to http://localhost:8000 or any other port you choose to see your application in the browser.
Change port docker
There are some limitations to working this way, for example, when running multiple projects simultaneously. This can happen when you have to switch projects or the project grows and other applications are developed that run alongside the original application. In both these cases, you risk having containers listening on the same docker port, which will not work. You could give each container a different port to listen to, but then you have to start keeping track of which ports are already in use. This approach is not scalable and is also simply annoying.
Something that has always bothered me when developing on containers is that you actually have to browse to localhost and then add the desired port to the URL. Of course, this is really a minor thing, but it bothers me nonetheless. It’s just plain ugly
Docker Port Forwarding Explained
Docker port forwarding is a mechanism that enables communication between a Docker container and the host system or other containers by mapping network ports. Docker forwards incoming traffic from a specific port on the host to a corresponding port within the container by specifying port mappings during container creation or runtime. This allows external systems or services to access the containerized application through the host system's network interface, facilitating seamless network connectivity and interaction.
Incoming: Traefik Tutorial
For the last couple of years, I have solved this problem by using Traefik (pronounced like traffic). Traefik is a reverse proxy running in Docker but is also aware of Docker. In this post, I’m going to set up a system that makes our Docker containers accessible through a normal domain name without having to worry about port conflicts.
We will start by running a simple container exposing port 80 and have it mapped to port 8080 on our host system. Run docker-compose up with the following docker-compose.yml file.
 version: "3.8"
 services:
   apache:
     image: httpd:2.4-alpine
     ports:
       - 8080:80
Now go to http://localhost:8080 and you will see the test page of Apache.
Great success so far! Run docker-compose down to stop the container and clean everything up.
Now that we have assured Docker is working as expected, we will start setting up Traefik. Let’s start by making a new docker-compose.yml file with one service and one (docker) network.
 version: "3"
 services:
   traefik:
     restart: always
     image: traefik:v2.4
     container_name: traefik
     ports:
       - 80:80
       - 8080
     volumes:
       - /var/run/docker.sock:/var/run/docker.sock:ro
       - ./traefik.toml:/etc/traefik/traefik.toml
     labels:
       - traefik.enable=true
       - traefik.http.routers.api.rule=Host(`monitor.docker`)
       - traefik.http.routers.api.entrypoints=web
       - traefik.http.routers.api.service=api@internal
       - traefik.port=8080"
     networks:
       - proxy
 networks:
   proxy:
     driver: bridge
     name: proxy
Most of this should be pretty familiar if you have already used docker-compose, so I’ll just go over the interesting lines.
I stated before that Traefik is aware of Docker. This means that, while it is actually running in a container, Traefik knows that Docker is running. It will listen to Docker and inspect the labels on every container that is started. If it finds labels it can do something with, it will work its magic. For Traefik to listen to Docker, it needs access to the Docker socket.
 volumes:
   - /var/run/docker.sock:/var/run/docker.sock:ro
Traefik comes by default with an API and a dashboard. It exposes both on port 8080. Since we don’t want to use ports anymore, we will add labels to the container so that it exposes both projects on the url: http://monitor.docker. I’ll explain these labels a little later.
    labels:
       - traefik.enable=true
       - traefik.http.routers.api.rule=Host(`monitor.docker`)
       - traefik.http.routers.api.entrypoints=web
       - traefik.http.routers.api.service=api@internal
       - traefik.port=8080
We create a network, called proxy. All containers that need to be made accessible through Traefik will have to be in this network.
 networks:
   proxy:
     driver: bridge
     name: proxy
Traefik itself can be configured using a file called traefik.toml. Here’s what mine looks like:
 [api]
   insecure = true
 [entryPoints.web]
   address = ":80"
 [providers.docker]
   exposedByDefault = false
   network = "proxy"
As you see, the configuration is rather simple. Let’s go over the different sections and explain in short what they do.
Traefik provides a dashboard by default. This setting makes sure that you can access it without a password or other security measures. Since we’re only running this locally, that’s perfectly fine. Don’t do this in production.
[api]
  insecure = true
We need to define entry points. From the Traefik documentation: entry points are the network entry points into Traefik. They define the port which will receive the packets and whether to listen for TCP or UDP.
We will define an entry point called web and have it listen on port 80.
 [entryPoints.web]
   address = ":80"
We also need to define a provider. We will use docker as a provider. From the documentation: “Providers discover the services that live on your infrastructure (their IP, health, …).” We will configure a docker provider. It connects to containers on the proxy network. We set exposedByDefault to false since we don’t need to have every container exposed by Traefik.
 [providers.docker]
   exposedByDefault = false
   network = "proxy"
There is one last thing we need to do before we can spin up Traefik and that is to point the monitor.docker url to localhost. Add this line to your hosts file:
127.0.0.1 monitor.dockerRun docker-compose up and off we go!
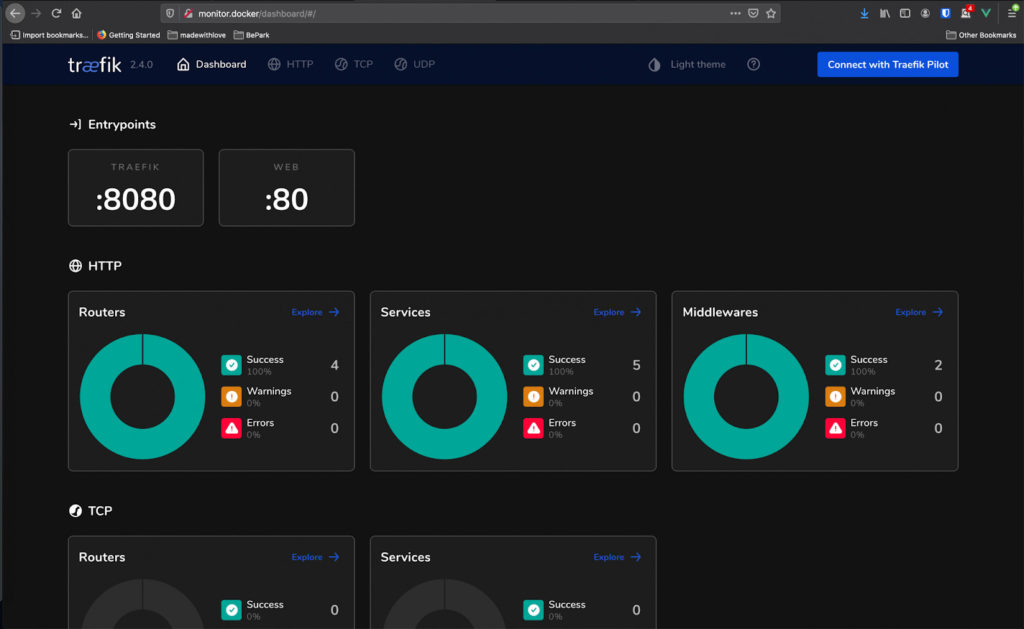
If you browse to http://monitor.docker/ you should see the Traefik dashboard.
We still need to make our Apache container accessible through Traefik. Traefik will look for certain labels on each container that is started, so we just need to provide the right ones when configuring the Apache container. We also have to add our container to the proxy network. This is what the updated docker-compose.yml file for our Apache service could look like.
 version: "3.8"
 services:
   apache:
     image: httpd:2.4-alpine
     container_name: apache
     ports:
       - 80
     labels:
       - traefik.enable=true
       - traefik.http.routers.apache.rule=Host(`apache.docker`)
       - traefik.http.routers.apache.entrypoints=web
       - traefik.port=80
     networks:
       - proxy

 networks:
   proxy:
     external: true
I’ll explain the different labels used here.
Expose host port to docker container (dockerfile port expose)
First of all, we need to make sure Traefik picks up this container. Because we disabled the exposedByDefault setting in the Traefik config, we need to explicitly say if we want the container exposed.
traefik.enable=trueWe define a router named “apache” and make sure it routes the apache.docker url to our container.
traefik.http.routers.apache.rule=Host(`apache.docker`)We want the router we defined to use the web entrypoint which listens on port 80, the default HTTP port.
traefik.http.routers.apache.entrypoints=webAnd last, but not least, we tell Traefik that our container is listening on port 80.
traefik.port=80Add the apache.docker url to your hosts file so it points to 127.0.0.1
127.0.0.1 apache.dockerRun docker-compose up with your docker-compose file for Apache. Now you should be able to browse to http://apache.docker/ and you should see the Apache test page.
No more annoying ports in your dev setup ever again! Hurray!
There are several improvements I can think of:
- Use a tool like
dnsmasqto stop having to configure your hosts file for every new service - Make your database accessible in a similar way
- Add HTTPS
But those are maybe for another blog post.
Next up: Using an SSH tunnel to connect to your dev MySQL with Docker


