

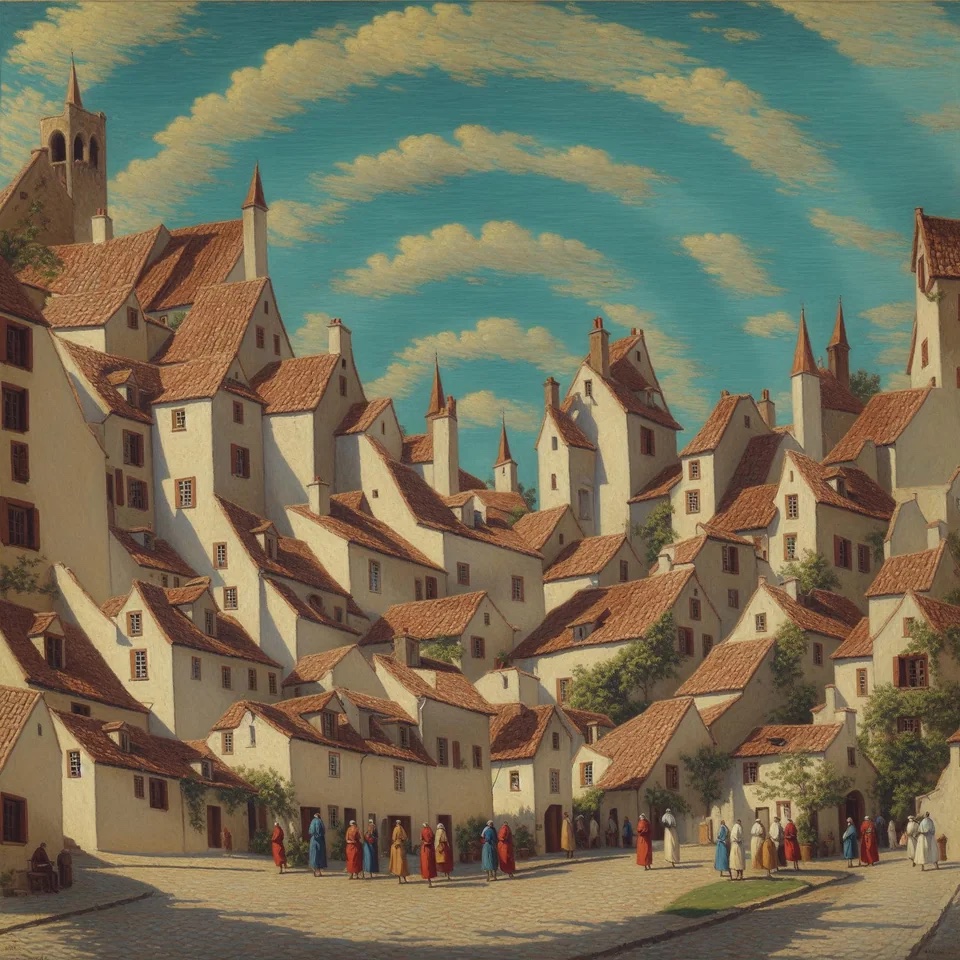
It all started with one picture: an almost normal painting of a village. Encoded within was a spiral shape, only visible through the specific arrangement of subjects and colors on the painting.
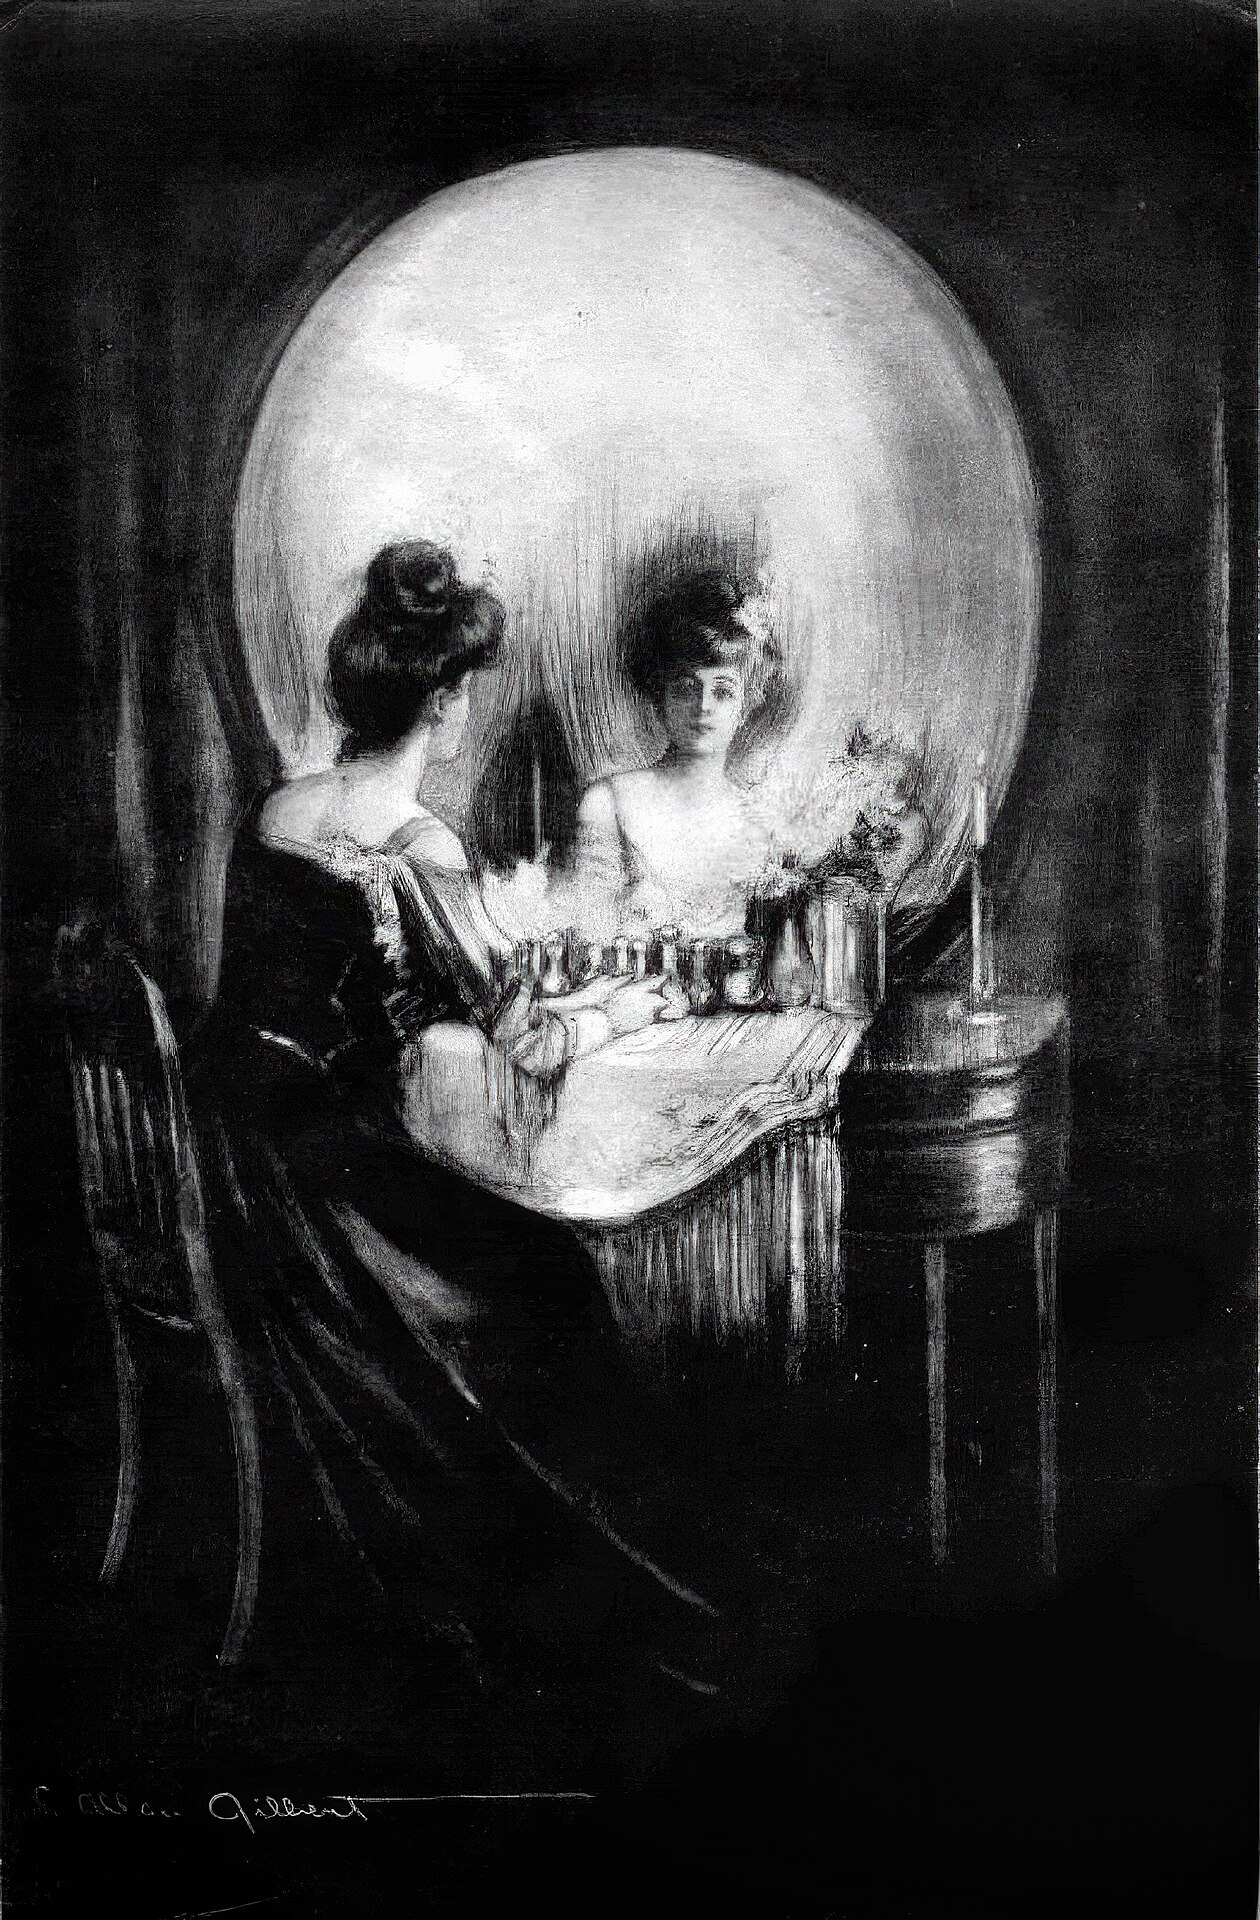
The effect itself was nothing quite so new. In fact it was a trend for a long while and you can find a lot of classical paintings that have the same concept, like this famous one from 1892 by Charles Allan Gilbert called All Is Vanity.
The birth of a trend
What caught the internet’s attention wasn’t that a new unique art style was emerging. It was that an AI-generated image was capable of reaching this level of “hidden encoded meaning” without compromising the original subject being depicted. For many, this was still part of the holy group of “things AI can’t do”. Additionally, for a lot of detractors of media synthesis, this was one of the first pieces where it was hard to argue against its artistic value. Usually one of the main arguments is that the images coming out of these models are “objectively not art.” And while it’s still a heated debate about who (if anybody) can be considered the “artist” of the spiral piece, I don’t think many people could argue it lacked the ability to evoke emotion and interest in its viewer, which to me is one of the main criteria for art.
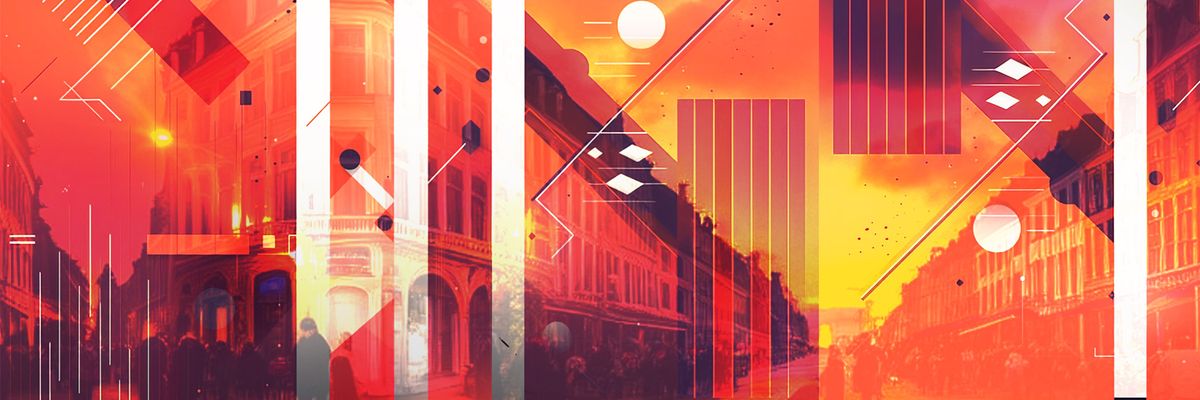
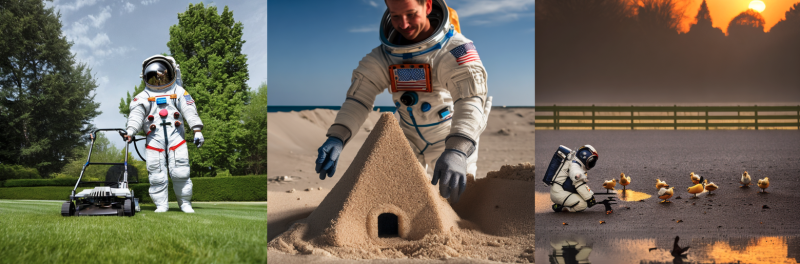
Now if this was a traditional painting the story would have stopped there. But because this was an AI-generated image, what happened is that suddenly everyone wanted to generate the same kind of image. And they could, by just tying together existing technologies easily. From this point on, things snowballed, everybody got in on it, and we started to see a rapid flood of these AI optical illusions. At first, people kept exploiting the theme of the spiral and shapes:
But quickly people realized that because this is AI, you could actually get much wilder than this. So instead of patterns, people started having fun with text, including animating the resulting pictures, and creating interesting animated pieces.
PEACE - Source: Reddit
LOVE - Source: Twitter
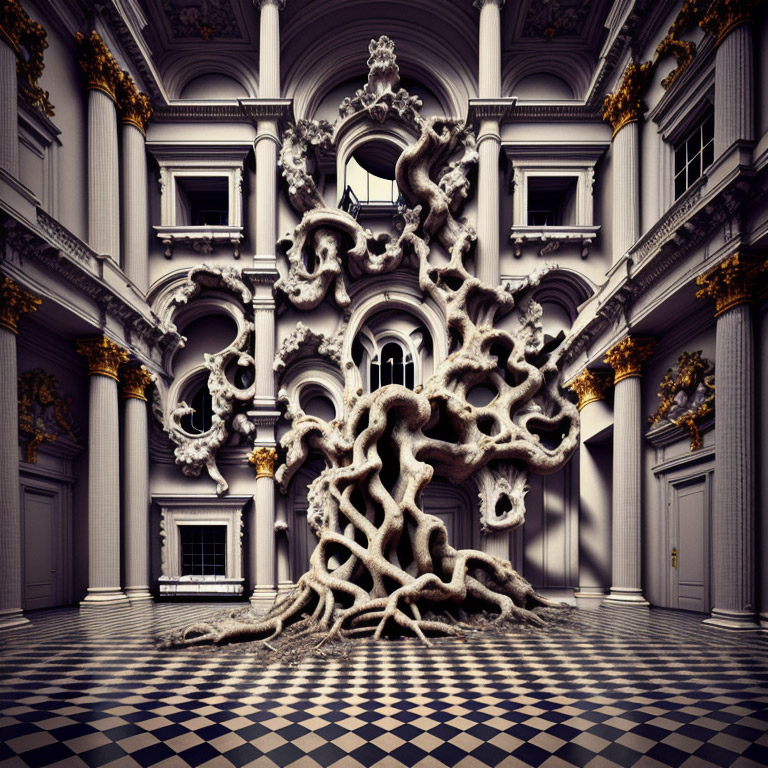
Others realized you could actually use anything as a pattern, including other images and paintings:
The reason I bring all this up is because this is the perfect encapsulation of what makes me enthusiastic about AI and media synthesis as a whole. While the images themselves are fascinating, what I loved was that at no point did the creator of the original spiral image try to close the door behind him.
He explained how he did it, and then people followed and started sharing amongst themselves. And I love nothing more than people getting creative and enthusiastic about what they make, even more, when it comes from people who usually don’t think they have the skills in the first place.
I love people being open about their process and generally just wanting to move the medium forward without hindering themselves in ownership and profit and all the capitalistic aspects of art. Just having fun and bringing new cool and weird things into the world for the sake of tickling our collective minds is great!
The art style and optical effect itself are secondary to the story and are only a product of an image generation model being “good enough” that it became possible. It’s not even clear to me whether the effect would have worked as well had existing similar optical illusion pieces not been present in the datasets, regardless of the technology driving it. But how does it even work? How can an image generation model be made to generate “two images at once?”?
Follow our bi-weekly insights on Spotify: where Dimitri and Andreas discuss what they're seeing at SaaS teams and trends they're watching closely.
Decomposing the effect
To understand how those images came, it’s important to understand that there are multiple things at play here.
- The first required element is, of course, an image generation model. There are many that are capable of pulling this off, but the one used for the original spiral image and most of the ones in this article were made with Stable Diffusion. Because it is an open-source model it’s also one of the most popular ones at the moment since it can easily be tinkered with and extended and so on, contrary to bigger popular image generation models like Midjourney or DALL-E.
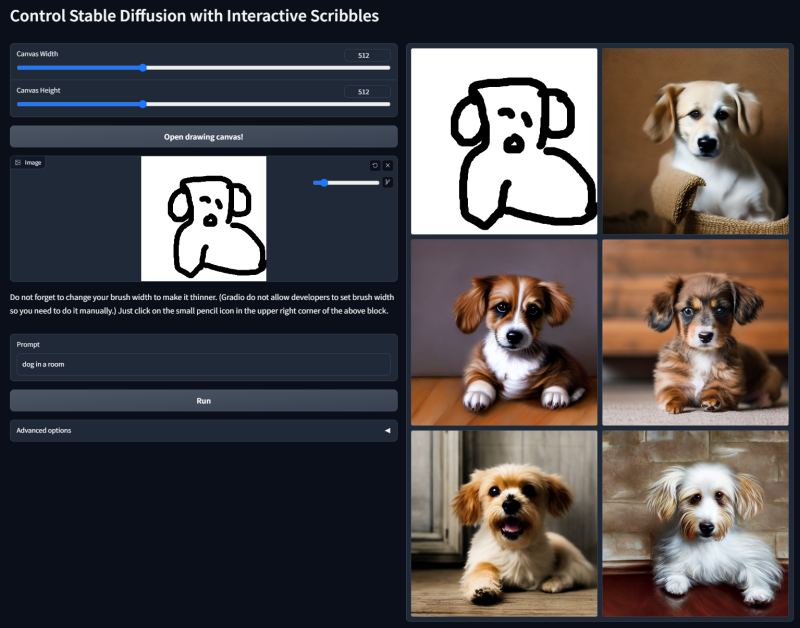
- Then you need a tool to “guide” the model during its generation process. This is achieved through a specific tool called ControlNet which will come sit on top of an existing image generation model and help control the generation so that the resulting image follows a set of spatial constraints (ie. things have to be in certain places). This is a very broad summary but imagine the base model as being a kid super eager to use their crayons, and ControlNet providing the lines to color into
- The last piece of the puzzle is the ControlNet model. Since it's also based on neural networks you need to provide a model file like for Stable Diffusion. For the optical illusion effect, you really want the model to stick very precisely to the lines (otherwise the effect doesn’t work). That’s where a third tool comes in, called QRCode Monster. It is basically a special version of ControlNet made to be super faithful to the “control” image, which was originally to generate working QR codes, a use case in which you also need very faithful generation and precision if you want the codes to actually still work.
So in summary what the original person did is basically take this tool that was made to make fancy illustrated QR codes and give it something other than a QR code. That’s it.
Recreating the effect
Now that we’ve looked a bit at the theory, let’s combine the pieces together and generate our own AI optical illusions. We’ll need to download a few things to get us started.
Installing the UI
First of all, while Stable Diffusion is open source and all, it is still merely a tool to convert text to image. This means it doesn’t come with a full software solution to use it — at least not for free.
In order to use it, we’ll install one of the most popular interfaces at the moment, simply called Stable Diffusion Web UI. All you need to do is clone the repository, and then follow the instructions for your system. Usually it’s a matter of installing a few dependencies such as Python and Git, but nothing too complex.
Once that is done you can start the application by navigating to the folder and running the webui.sh file located at the root. The repository will install its dependencies and start doing some preparation. During this preparation, it will actually download Stable Diffusion itself, which is required and is around ~4gb so it might take a while to finish the first time setup. Once it is done though, it will start and this is what you should be welcomed with:
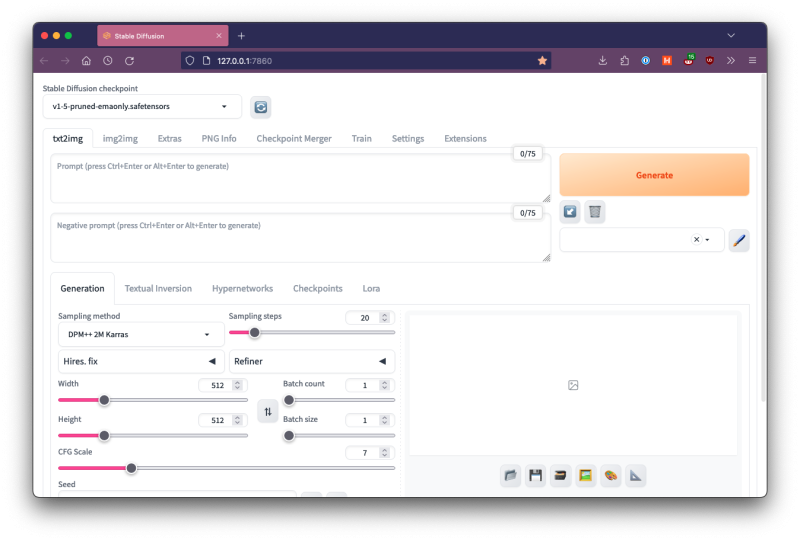
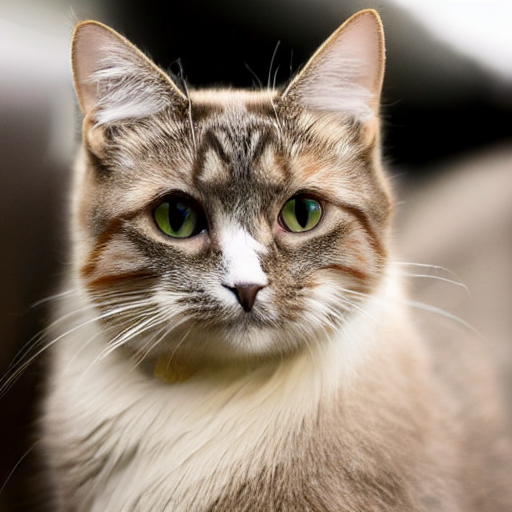
It comes with sensible defaults so if you’ve never played with Stable Diffusion before, you can dive right in. This tutorial is written using Stable Diffusion v1.5 so make sure that is selected in the top-left drop-down. To test, you can type something into the first text area, for example “cat”, and then press the big Generate button. If everything worked you should get something like this, if not you can always check the Troubleshooting section of the Web UI.
Installing ControlNet
Next, we’ll need to add ControlNet to our Web UI via its plugin system. Navigate to the Extensions tab, then Available, and click the big Load button to fetch the up-to-date list of available extensions. I also recommend sorting by “stars” to get the most popular first.
From there, simply type ControlNet in the search field and it should be the first result so you can click the Install button at the end of its row.
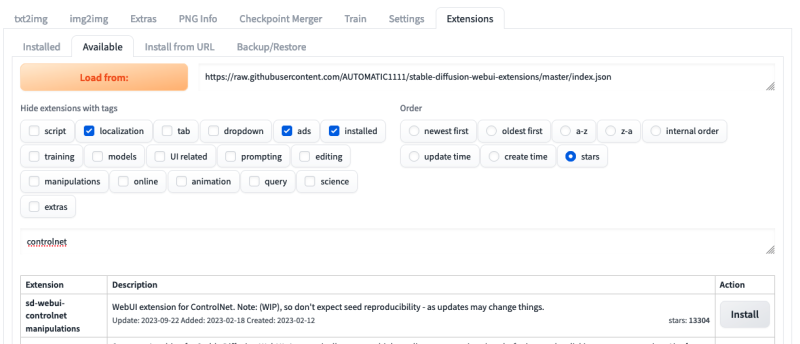
It might take around a minute or so to download. Once it’s done, you should see it installed and checked in the Installed tab. To finalize the installation, click on the big Apply and Restart button and the page should refresh.
Once it’s done, you should see a new element appear at the bottom of the txt2img tab. Clicking on it will reveal a world of confusing options — ready to overwhelm you — but let’s disregard that for a second. 😅
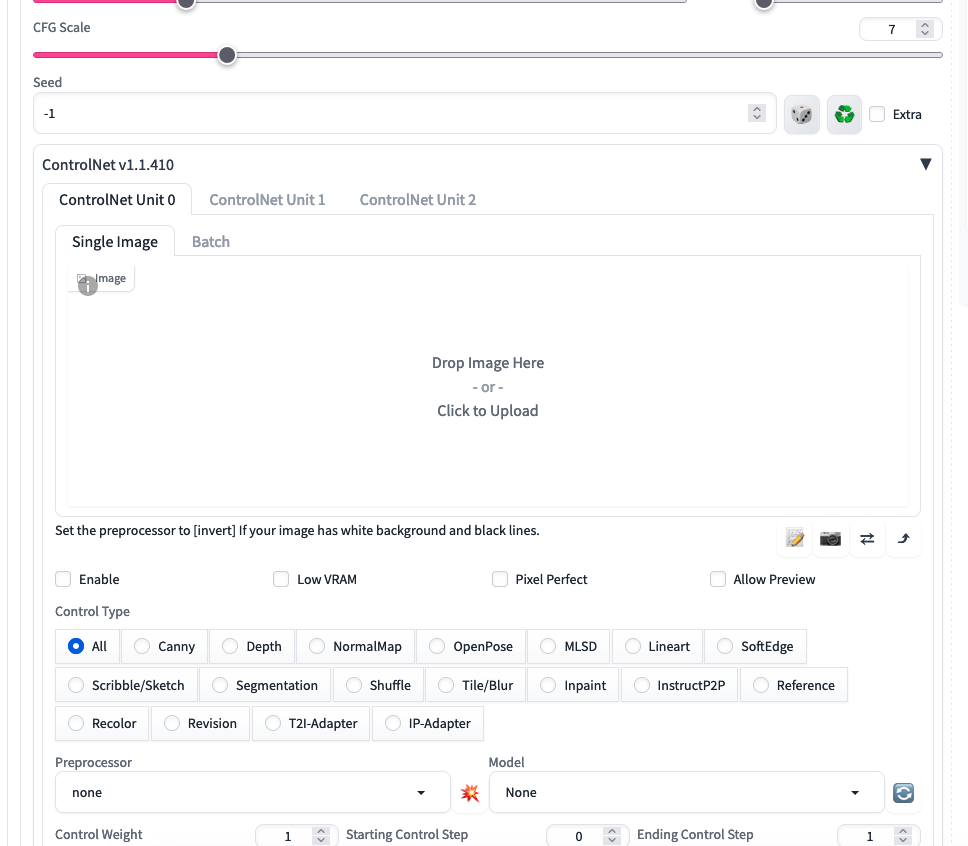
What interests us is the Model option in the bottom right, which should be empty right now. This leads us to the last step: installing the ControlNet model.
Installing QRCode Monster
To install it, you’ll need to download control_v1p_sd15_qrcode_monster.safetensors off their Hugging Face page (here for direct link). As you can see in the filename, it is tailor-made for Stable Diffusion 1.5 (SD1.5) which is the version we use in this tutorial. If you’re reading this article in the future and the Web UI installed a later version of Stable Diffusion, pick the matching QRCode Monster version.
Note that 1.5 is not the latest nor best version of Stable Diffusion but it is the version that the effect definitely works with so let’s continue with it.
Once the file is downloaded, you’ll need to move it to /stable-diffusion-webui/models/ControlNet/control_v1p_sd15_qrcode_monster.safetensors. With it in there, if you go back to the UI and click on the little refresh button (🔁) next to the Model field; it should suddenly appear there, allowing you to select it. And there you go, we have our three infinity st necessary tools installed.
Generating images
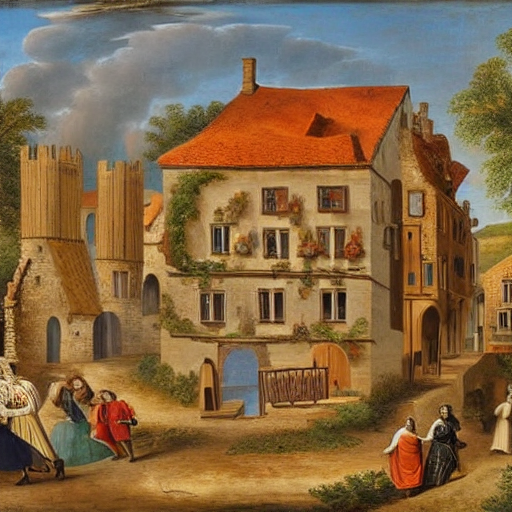
Before we start, let’s set up our prompt to match the one used by the original creator. Copy/paste this in the main “Prompt” box at the top:
(masterpiece:1.4), (best quality), (detailed), BREAK
Medieval village scene with busy streets and castle in the distance
And then this in the Negative prompt:
(worst quality, poor details:1.4), lowres, (artist name, signature, watermark:1.4), bad-artist-anime, bad_prompt_version2, bad-hands-5, ng_deepnegative_v1_75t
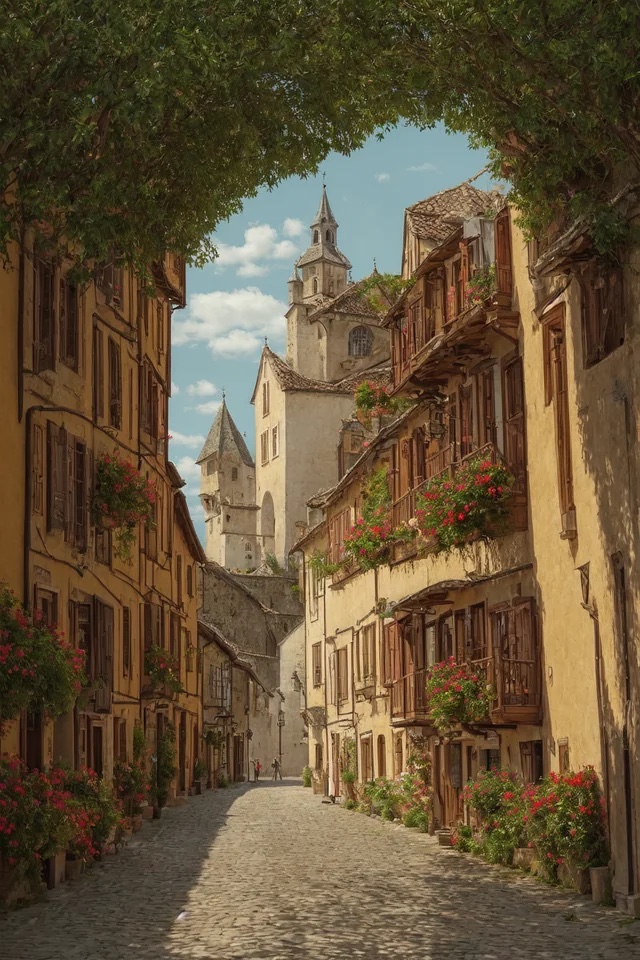
I won’t go into the details of what each word does because they’re not all best practices and some are specific to SD1.5; so let’s just roll with it for the sake of the tutorial. If you click Generate right now you should get something like this:
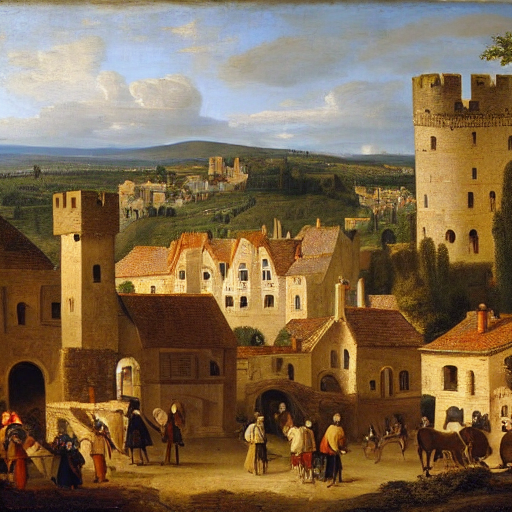
In order to demonstrate the effect itself let’s also use the very same spiral used by the creator, which you can grab below.
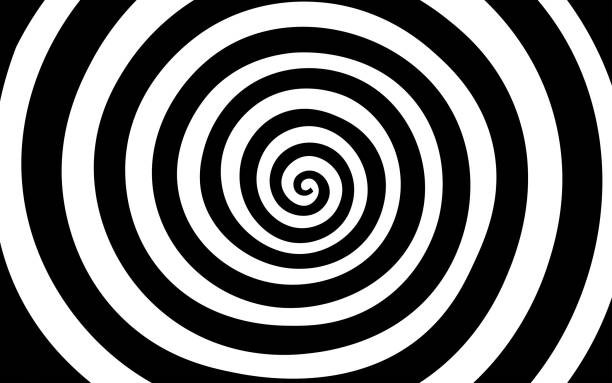
Simply drag and drop it into the big Image field of the ControlNet section. You will also need to tick the small “Enable” checkbox right underneath to actually make the UI use ControlNet for the next image generation(s).
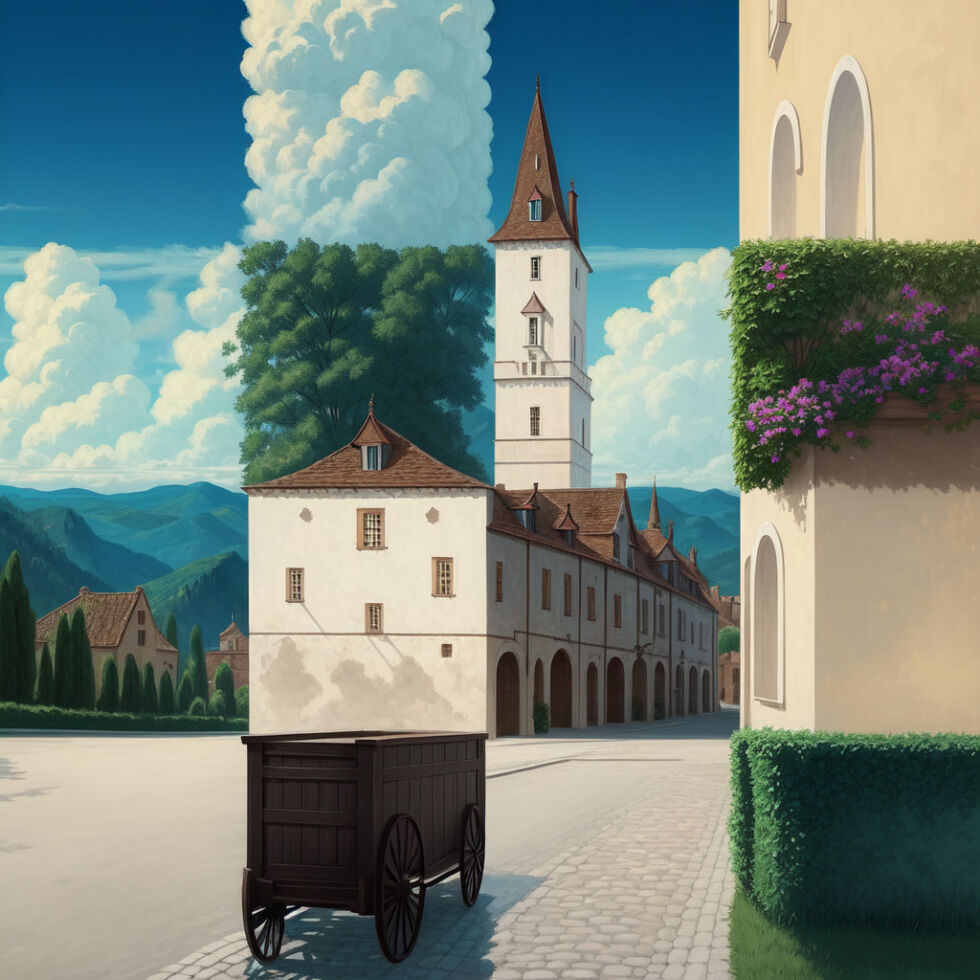
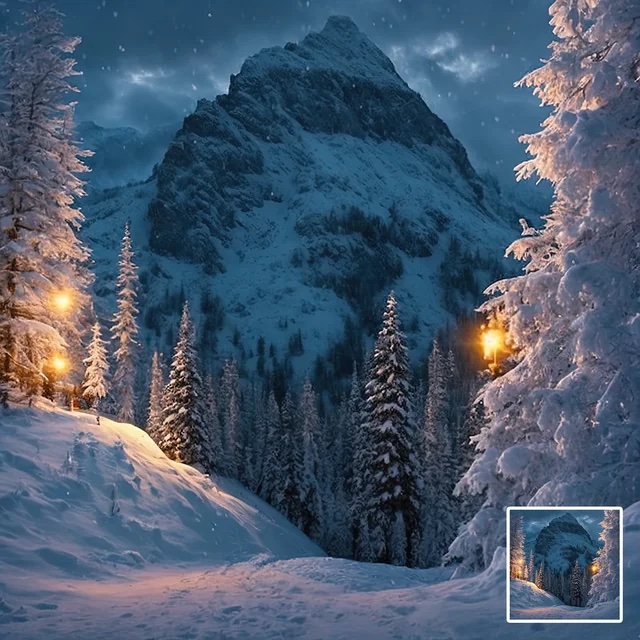
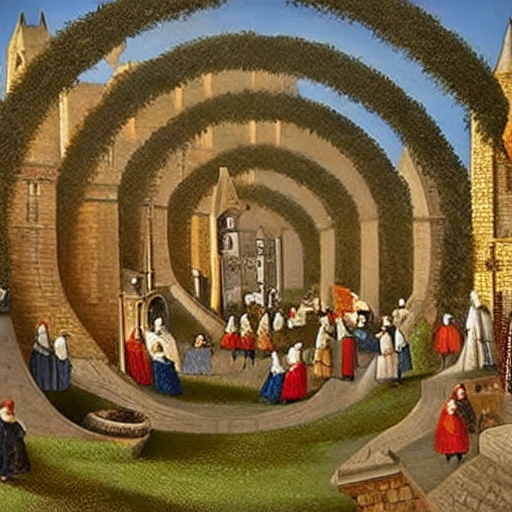
One last setting we will change is Control Weight, which tells ControlNet how much to enforce the pattern. You’ll want to play with this a lot since a lot of the “illusion” part hinges on the pattern being clearly there but also not. Let’s start with 0.75, for example. And there we go. Click Generate again and now our medieval town should be subtly spiraling around.
As you can see a control weight of 0.75 leaves the pattern relatively subtle in the image. But if we were to take it higher to 1 for example then it becomes much more visible (to the detriment of the picture). Think of it a bit like the opacity of the pattern.
Another setting you will want to play with is the Sampling Steps in the main settings, which dictates how many cycles the model should spend on the image before it considers it done (to simplify). The default of 20 is very solid, but sometimes playing with higher values can yield better results depending on the prompt and use case.
Classifier Free Guidance (CGF) can be an interesting setting to play with too since it controls how closely the system follows your prompt.
Switching it up
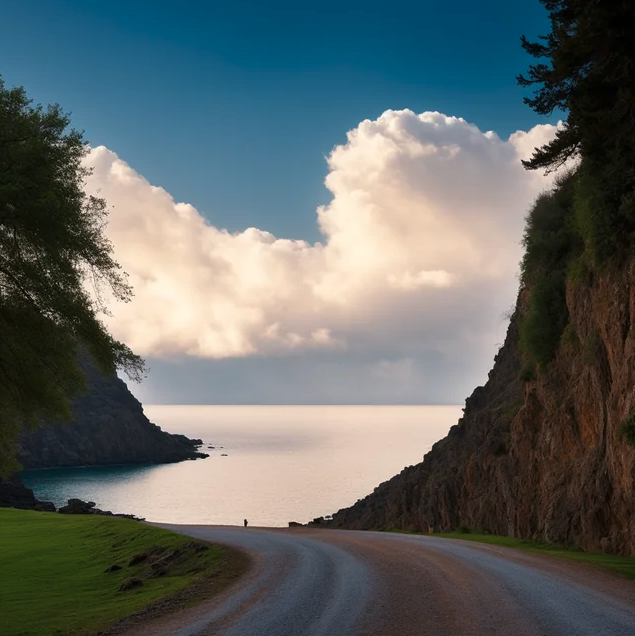
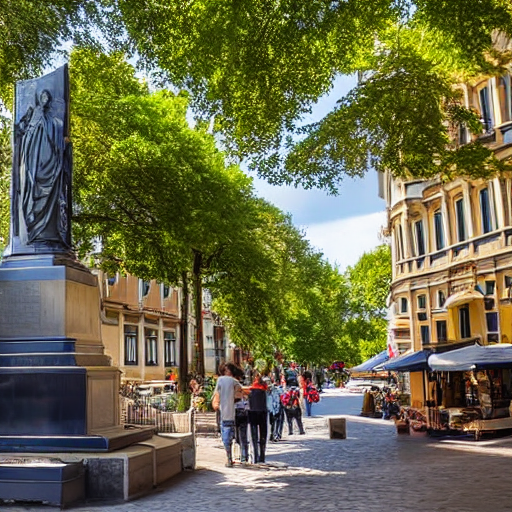
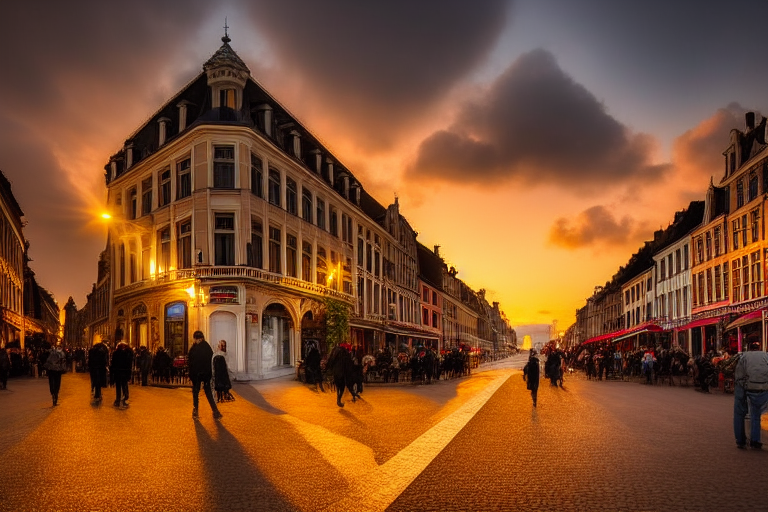
Now that we have all the basics in place, let’s try to experiment a bit to understand it better. Instead of a spiral, let’s use our own madewithlove logo because why not. And instead of a painting of a medieval village, let’s go for a photograph of European streets since they’re the ones I know most.

Let’s slightly switch our prompt to match this:
(masterpiece:1.4), (best quality), (detailed), BREAK

European streets photograph with busy streets and monument in the distance
Now click Generate and there we go:
From this point on you should be able to tinker and play with the configuration in a lot of different ways. An evident one is to switch up the aspect ratio which you can easily do in the UI. Do keep in mind that you’ll need to adapt your pattern to the new ratio (either through the built in Resize setting or by editing the pattern image). Here’s an example of the same idea but in landscape ratio.
Next steps
This tutorial follows a close equivalent of the process that yielded the original viral image. But it doesn’t mean it’s the ideal process. The first thing you would likely change is to use a more recent version of Stable Diffusion, such as version 2.1. You will also need to update the ControlNet model to match (like this one) but I haven’t tried it yet so I can’t confirm how well it works with the same settings.
More generally the main thing to play with from here is simply the settings available at hand, tweaking the prompt, changing the SD settings, or ControlNet’s configuration. Just play with it, generate, try and retry and I think you cannot go wrong.
At the end of the day the viral picture was, by all accounts, the result of trial and error, the combination of existing technologies in a novel way that gave it a new breath.
So my advice is to continue in that spirit: check the other Web UI extensions, try weirder patterns, throw the output images into video generation, and whatever else you can think of! Just experiment and create weird things and you can’t go wrong. Have fun!


